Copy of "Monarch Of The Glen" Marlins, or A Tale Of Two Rifles, One End
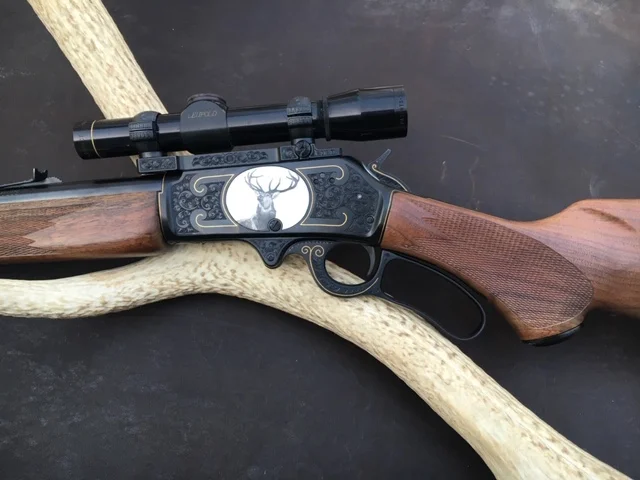
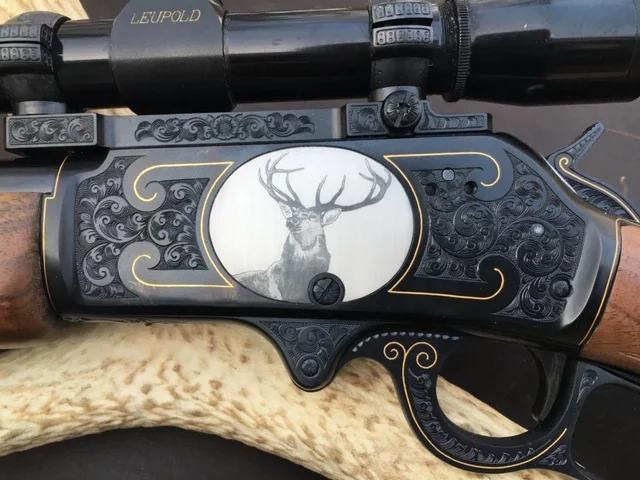
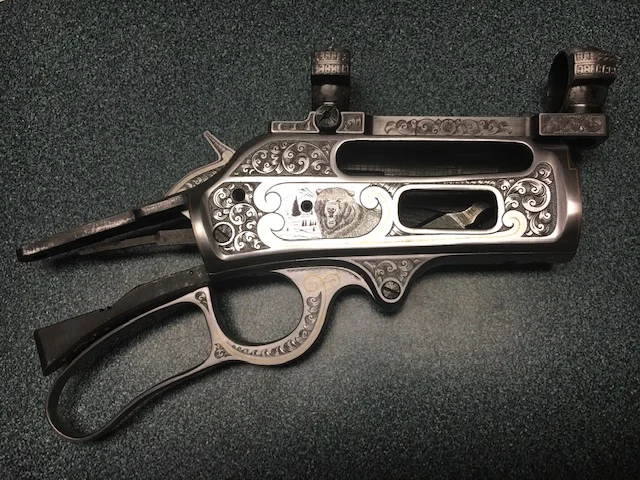
This segment of engraving comes from two rifles. The first is a Wild West Guns CoPilot in 45/70 that I engraved for a good attorney friend who lives in Anchorage. He has superb connections in Scotland, as well as owning a home there. I have been his guest several times stalking red stag and was even fortunate enough to fish Her Majesty’s Balmoral Estate with him.
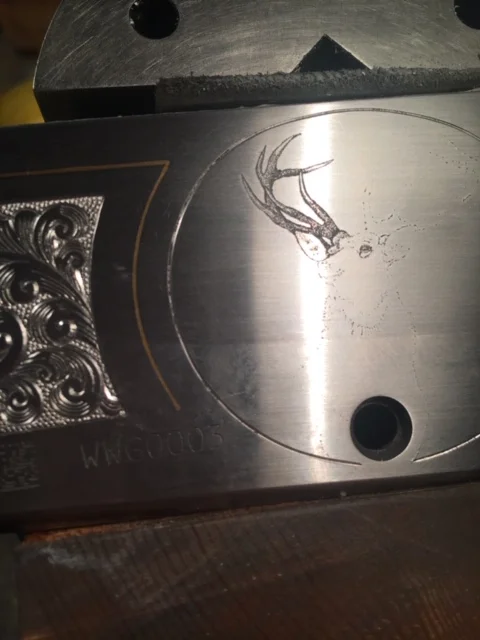
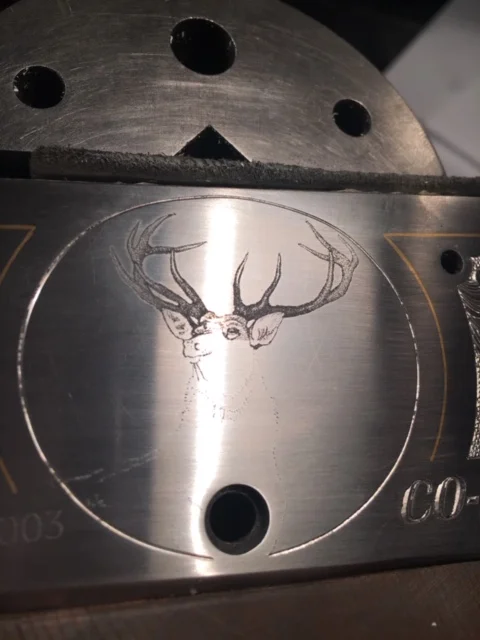
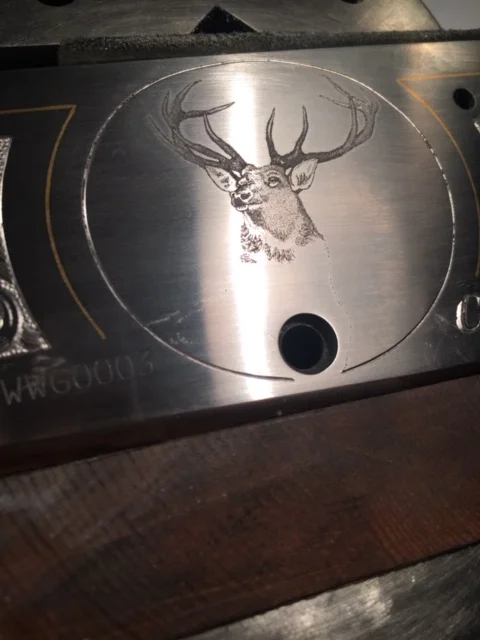
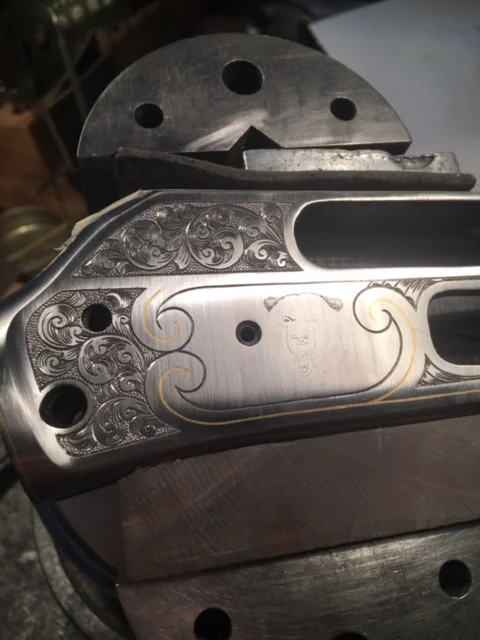
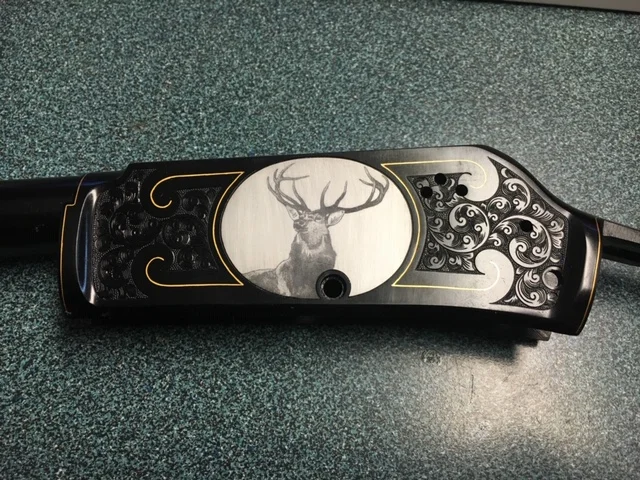
I decided to use the pattern I designed for Wild West Guns. The scrolled area is loosely based on the famous Marlin rifle presented to Annie Oakley. I then tailored the engraved images specifically for my friend. On the left side of the receiver I put a rendition of the stag from Sir Edwin Landseer’s famous painting titled “Monarch Of The Glenn.” You almost certainly have seen it as the Hartford Insurance Company’s logo. Sir Edwin painted it circa 1851, and it was very recently purchased by the Scottish Government for over $5,000,000 US.
I altered the stag’s antlers slightly to fit the oval I’d originally created for WWGs, while still retaining the somewhat stylized look of the stag as painted in the 1800s.
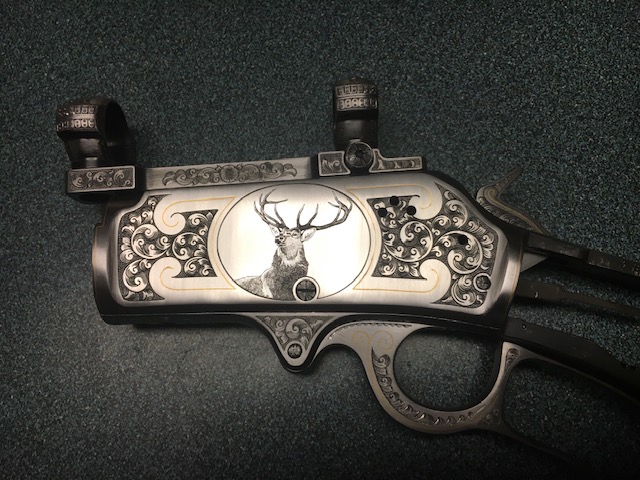
You can see in the progression photos that I like to begin engraving my bulino animals with the upper left portion of the pattern. I do this because I’m right handed, and my hand is not covering up the engraving as I progress. Engraving bulino animals is one of the most satisfying things I do, as the image seems to be emerging from the steel – it’s there all along – I’m just uncovering it.
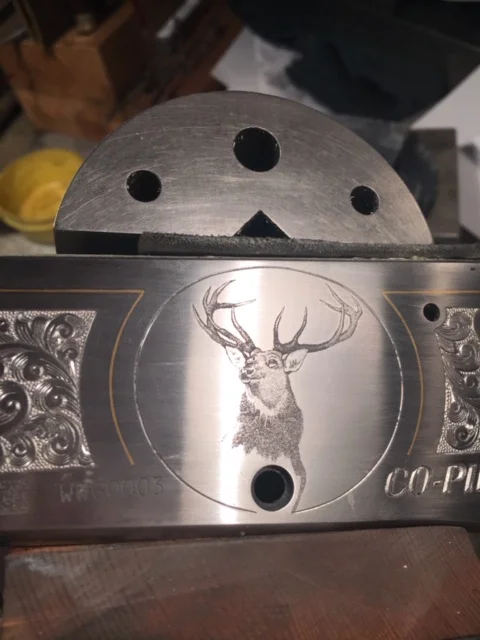
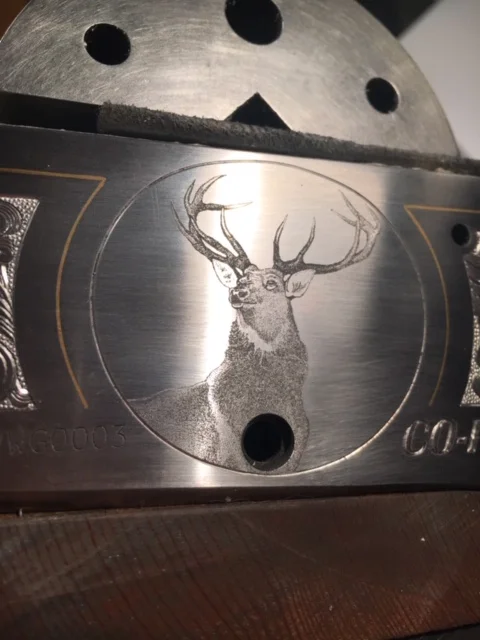
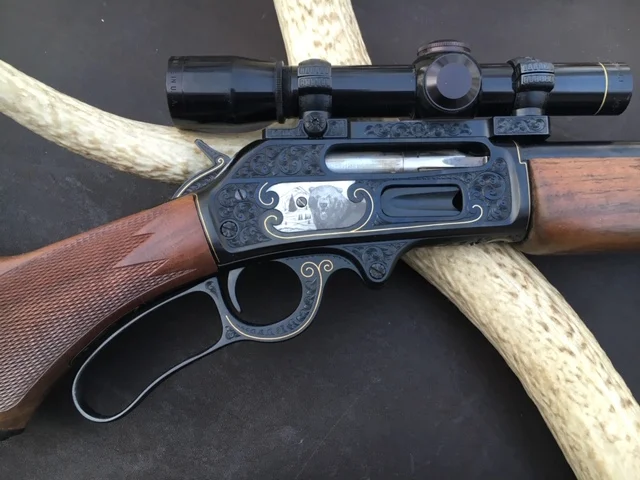
While the progression photos come from my friend’s stainless steel 45/70 Marlin Model 1895, for the second part I’m going to jump to my own 30-30 Marlin 336. I had an idea to produce a rather dramatic engraving, but at a cost much less than if I did the stag portion of the engraving entirely of 24K gold (I use 24K so it’s soft enough to hammer into the myriad cuts I make to hold it in place). I liked the Monarch stag I did for my friend enough to use it on my own rifle, adding the snarling bear scene on the right side of the receiver.
All original metal polishing and wood work is done first. Anyone who has carefully filed and sanded wood to perfectly fit a firearm knows how easy it is to nick or scratch the metal. Irritating, but not a catastrophe to quickly polish the nick out. Let there be damage to an engraved border or scroll, and it instantly becomes a real headache. The damage must be polished out, then re-engraved. The time spent sending it to the engraver and back, how long it takes him to work it into his schedule, and the cost of his labor all add up.
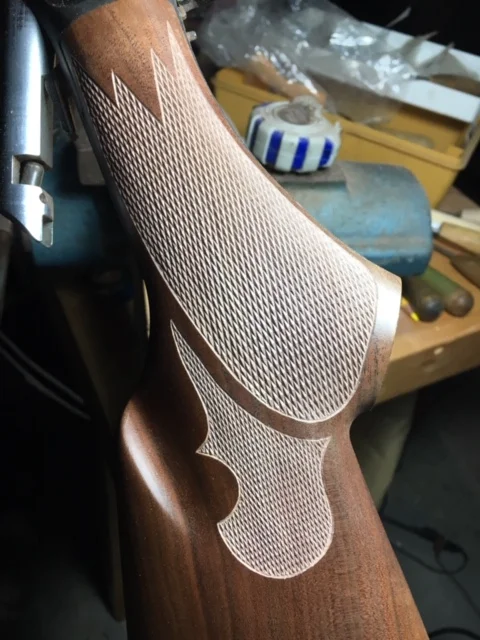
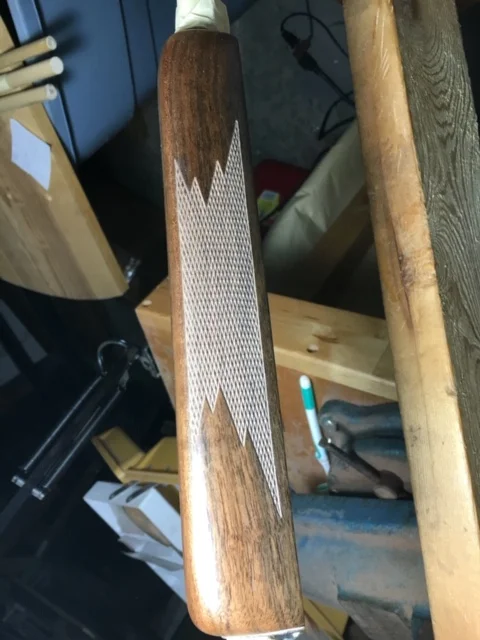
Since this is my own rifle, I did the stock work myself, using the original Marlin wood which has a touch of figure in it. While I don’t do checkering for others, I can if forced to. The Marlin wood on my rifle was large enough to remove all checkering and replace it with new. Most factories use a somewhat square checkering diamond, as opposed to the 3.5 times 1 width most custom stockmakers use. My replacement checkering uses the longer, custom diamond shape. You will note the simple filigree pattern I added behind the right grip panel. Note too, that it is of a finer line per inch spacing. Just a decorative touch I happen to like that gives it a custom look.
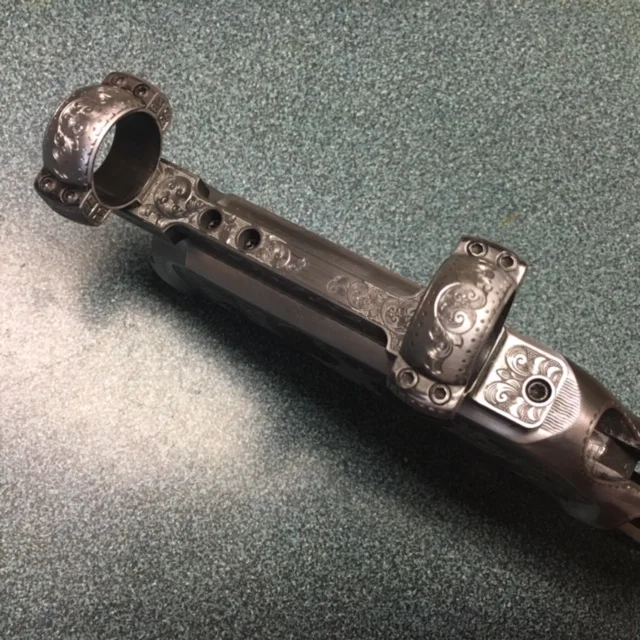
The proper sequence of engraving is to engrave the borders first, then the gold wire inlay followed by the scroll and its backgrounding. Once those are done, I add the bulino animals and scenes. The bulino is delicate enough that damage could occur when I remove the burrs raised by the graver cutting the scrolls, so is done last. With the bulino finished, all actual engraving is complete. I then have all the metal parts blued.
After I get the blued parts back, I use clear packaging tape to cover the bulino and surrounding areas. The progression pictures show the pattern creating an enclosed area around the animals and scenes. This gives me a definite place to start and stop my next step. With a sharp knife or razor blade, I cut out the packaging tape over the bulino areas.
Using a mild rust remover, I begin to carefully wipe the uncovered steel. Eventually, I have a soft silver grayish area. The bulino portion now appears strikingly obvious against the blue/black of the other parts, accented by the gold wire.

This technique is not particularly new. I do think it is a great way to produce a more affordable engraving, as opposed to using solid gold animals (particularly at current gold prices!). Finally, we have the rifle assembled and photographed!